CGSketch

architectural renderings | animations | vr

Tutorial - How to make dirty wine glasses


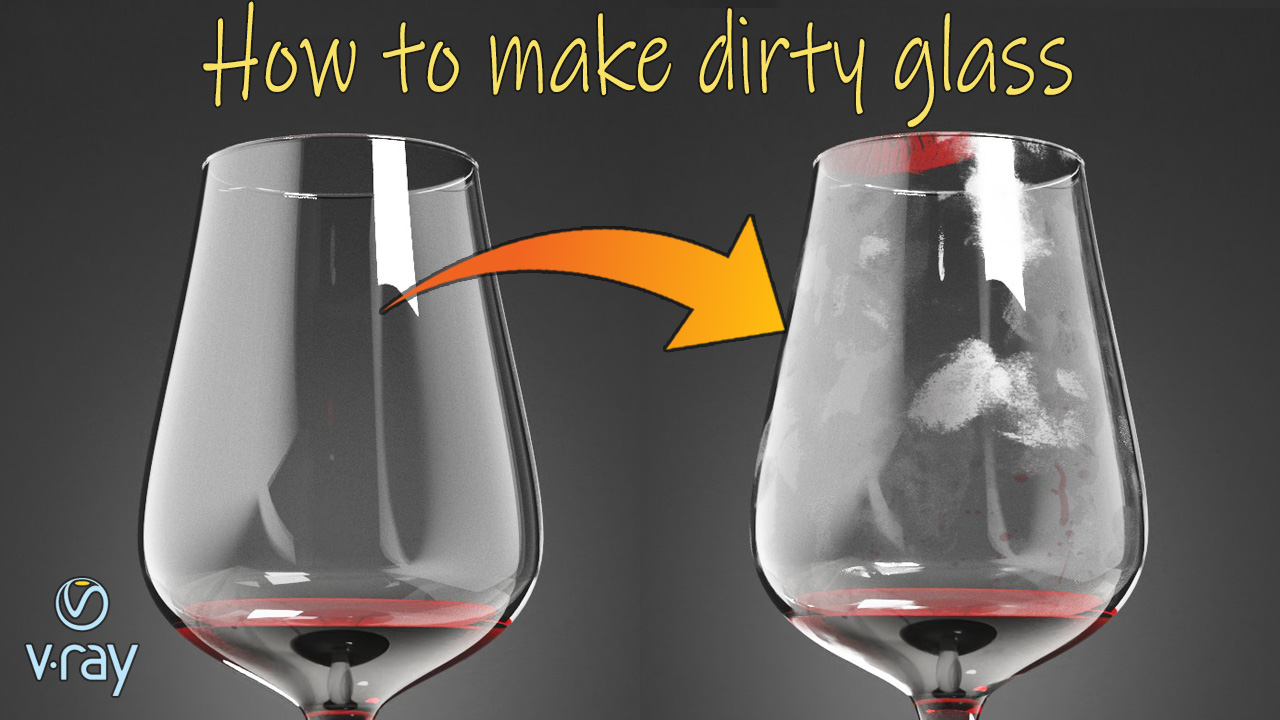
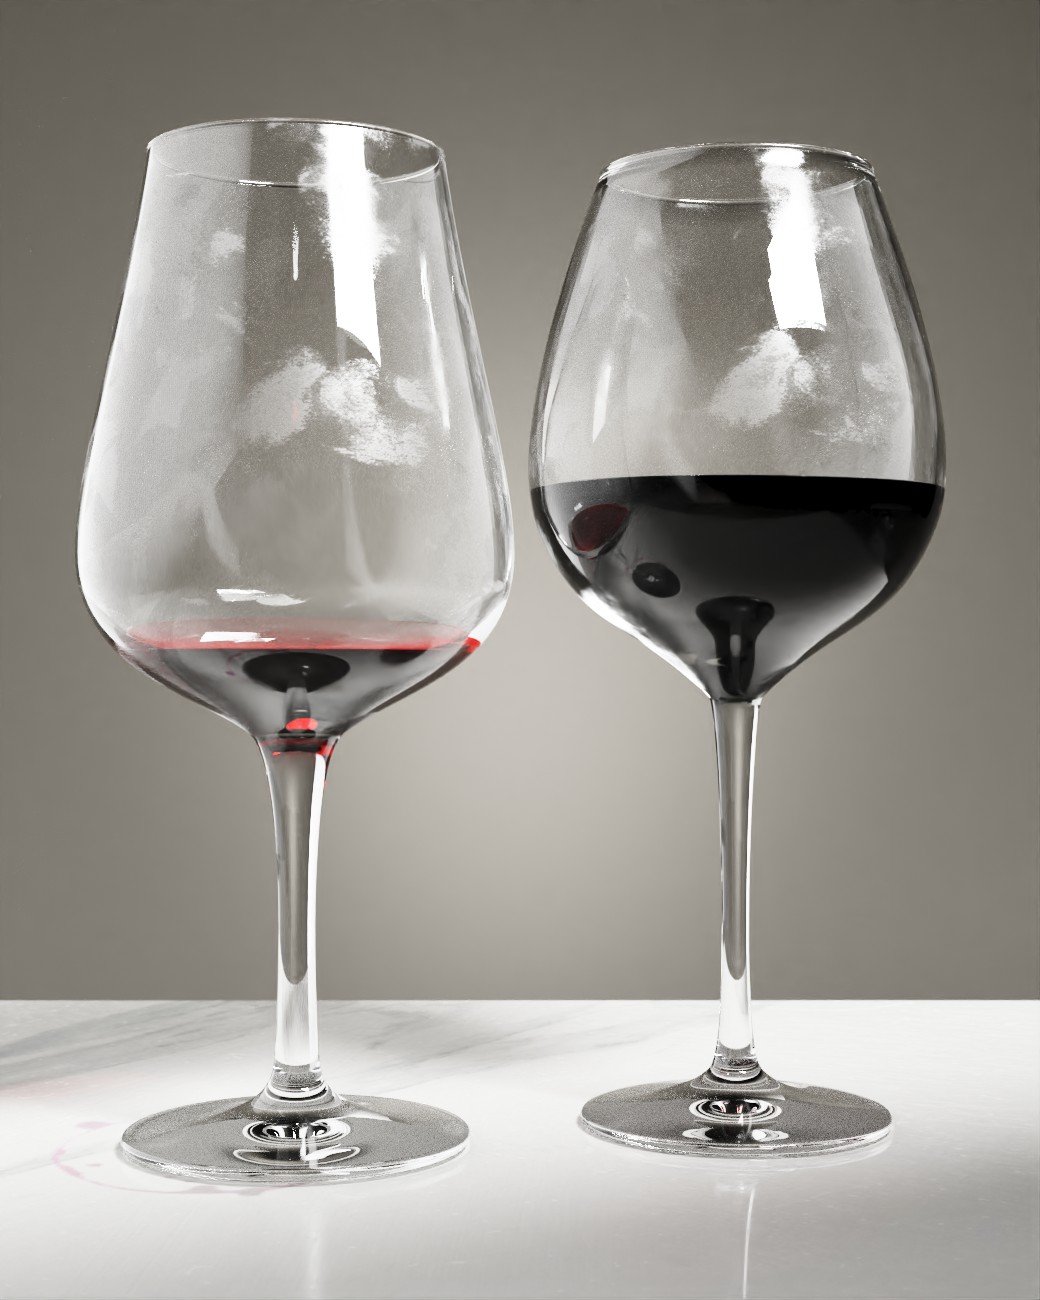
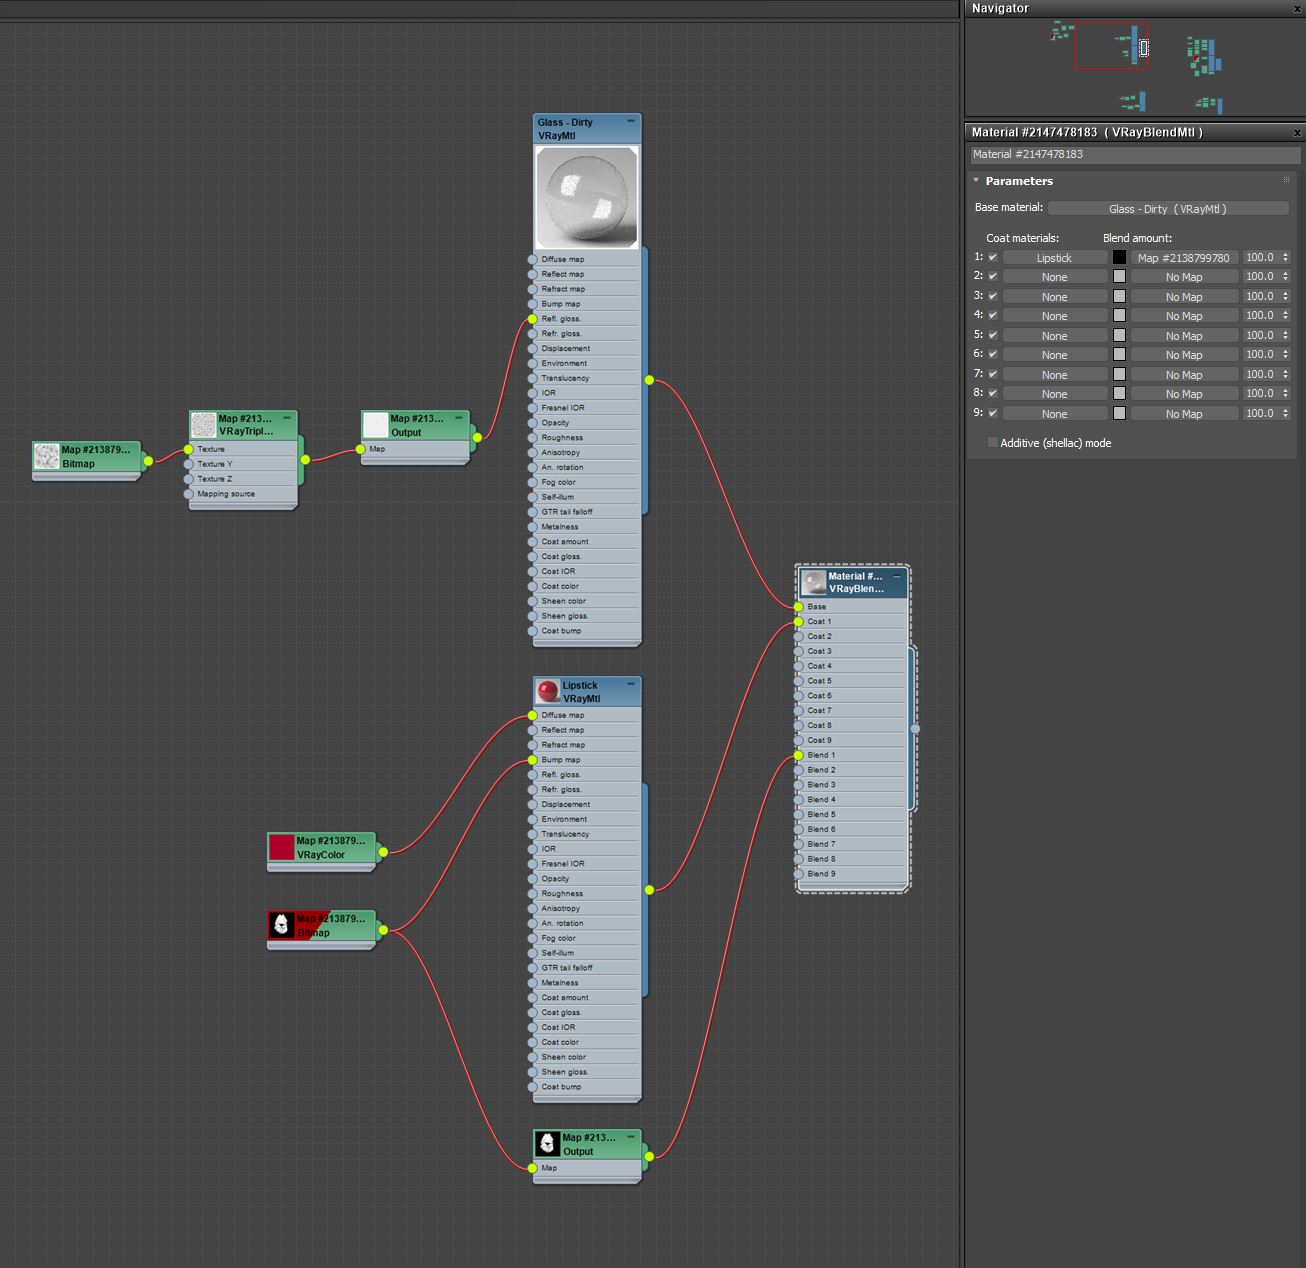
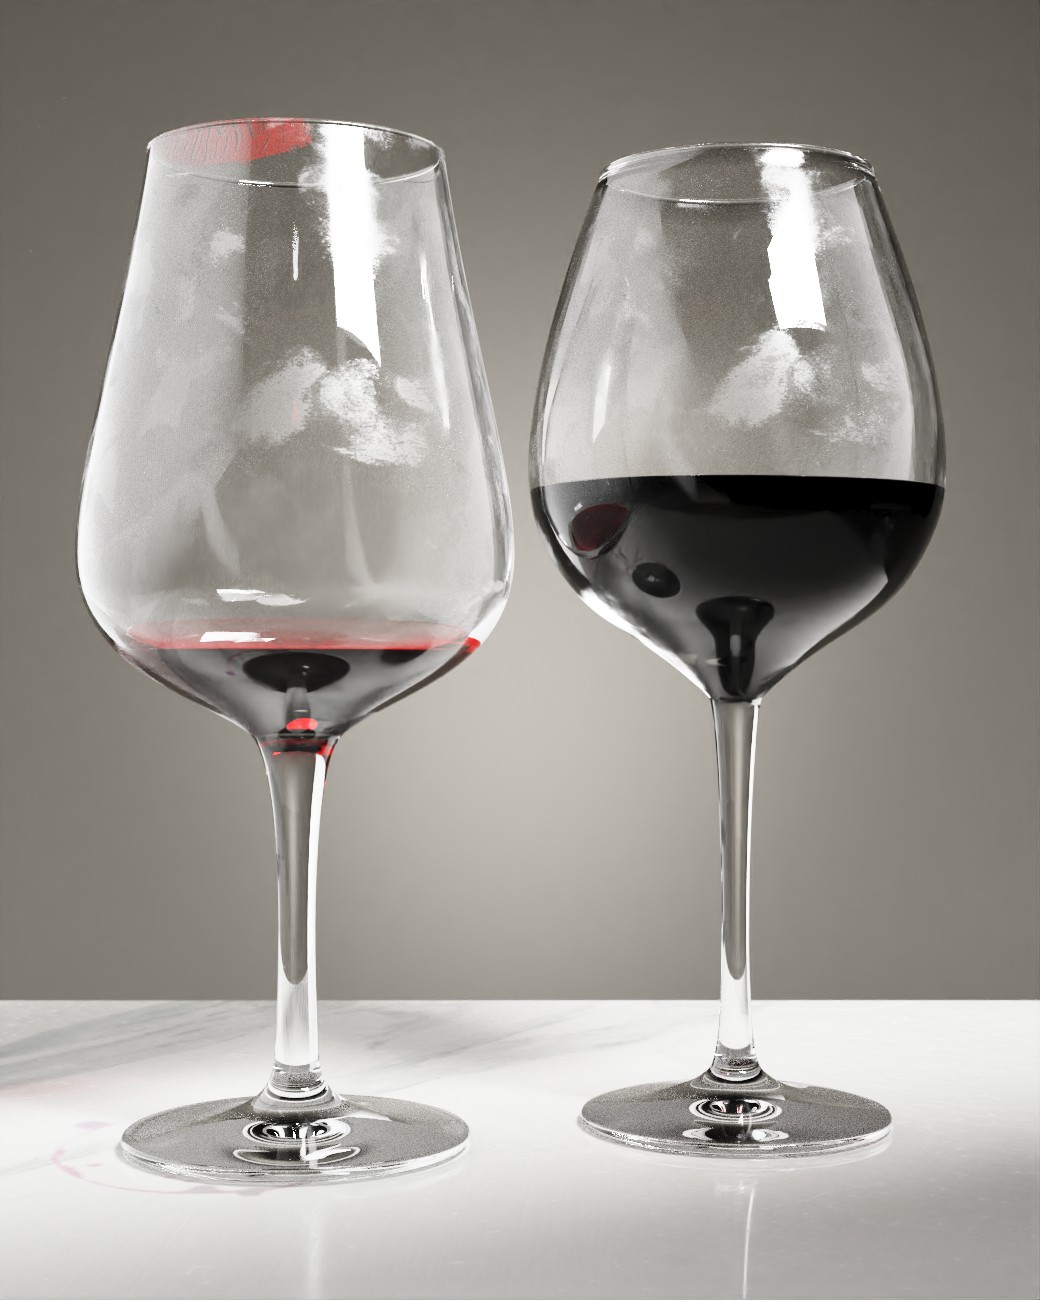
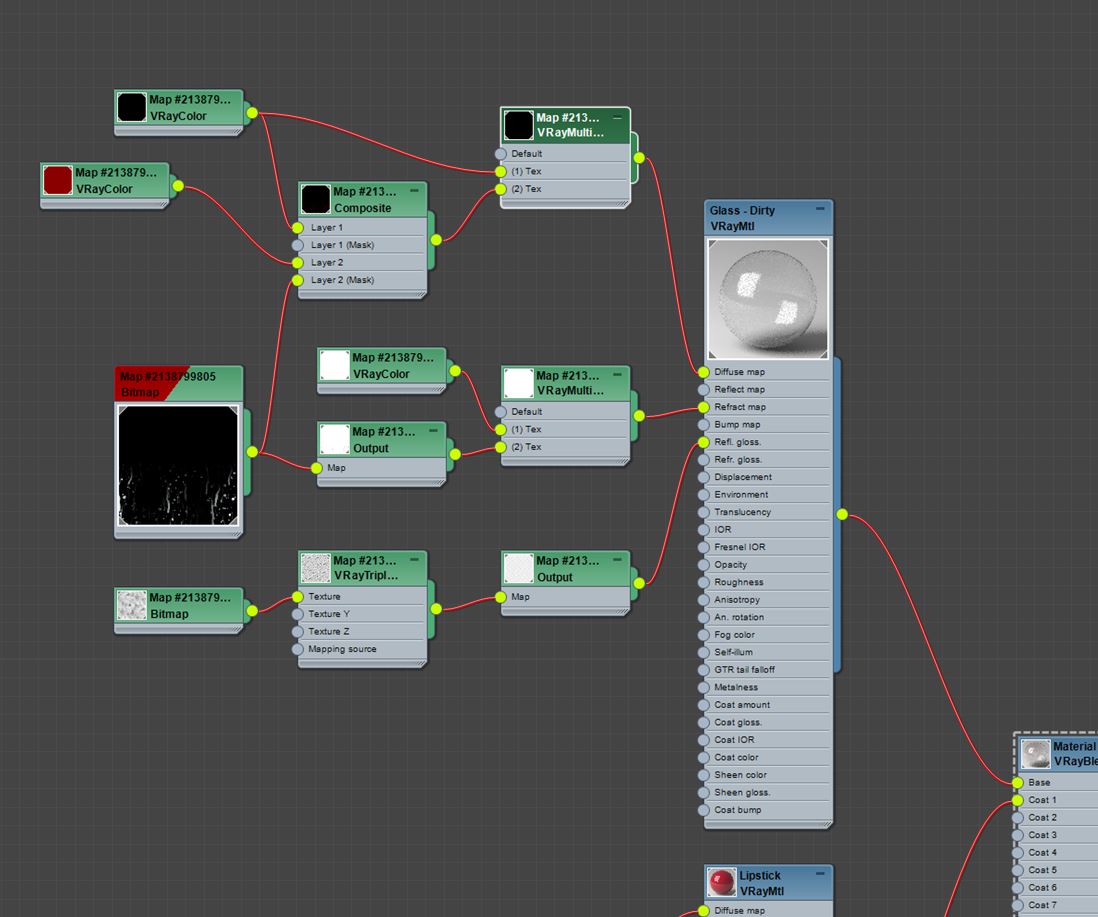
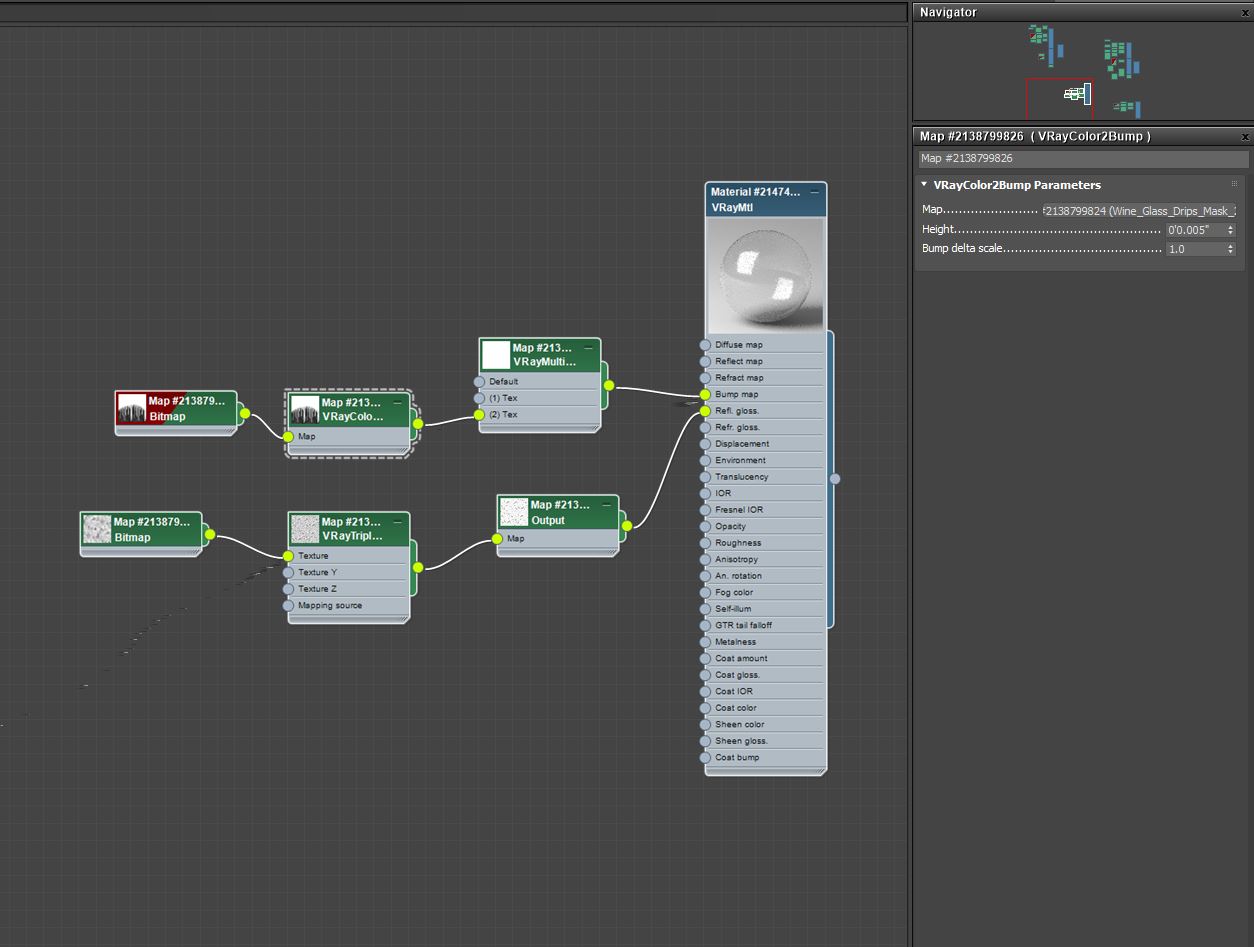
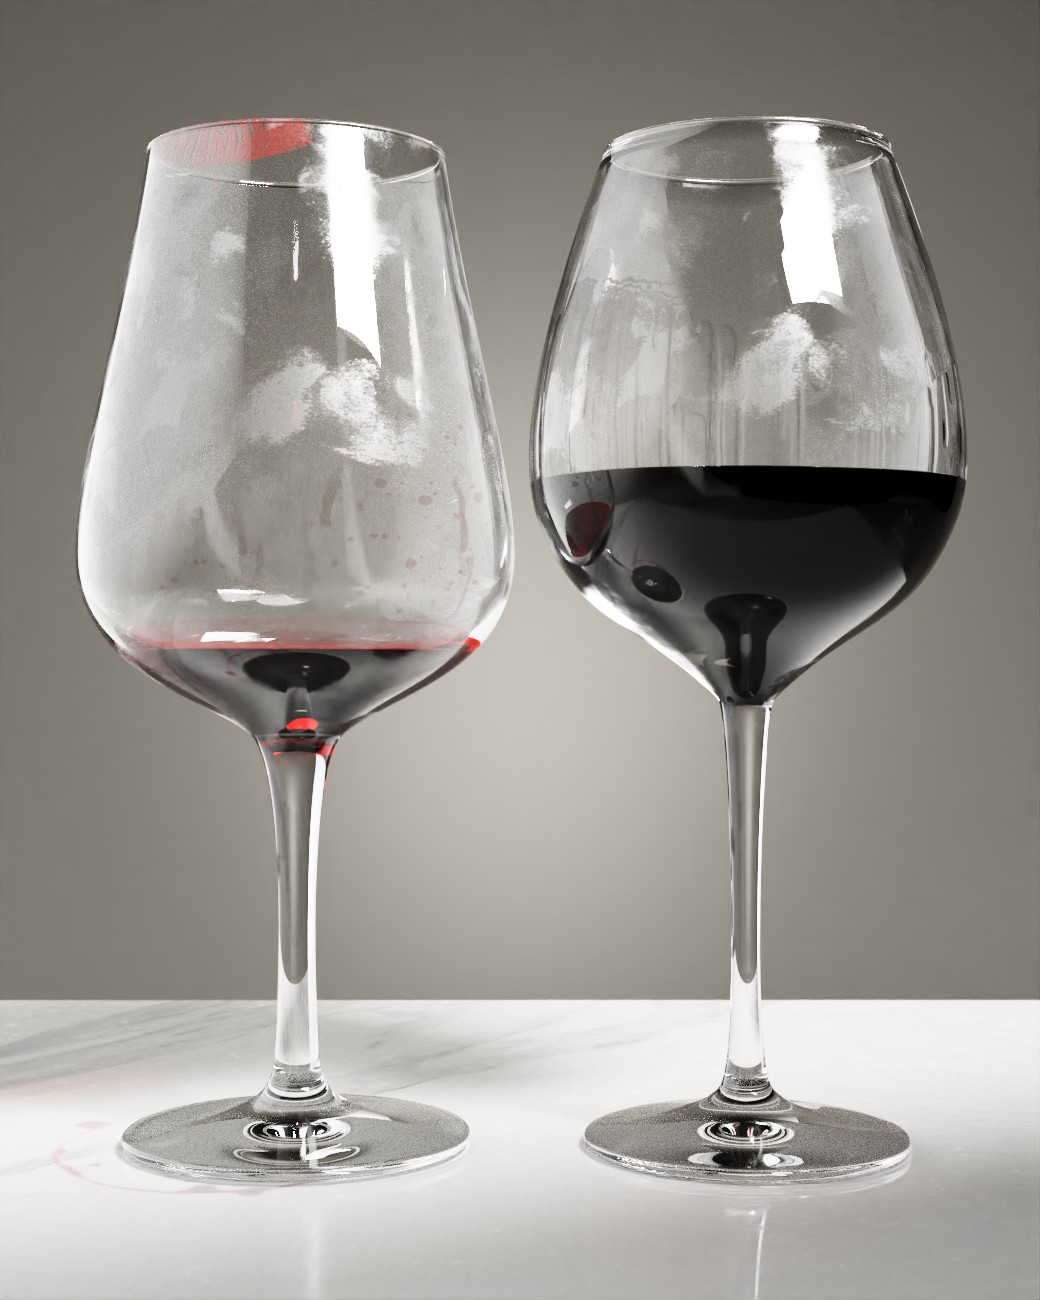
    Sometimes we need to make objects in our renderings dirty.  Why?  Because nothing in real life is polished clean to perfection.  There are always imperfections, no matter how miniscule: scruff marks, swirls, fingerprints, scratches etc.  With that in mind, today I'm going to talk about how to use various tools within Vray and 3ds to simulate dirty, smudgy wine glasses, as well as how to create wine legs dripping down the interior of the glass.  This will be part of a series of tutorials I will be doing analyzing how we can continue to add imperfections to our renderings in order to elevate their photorealism and just make them overall more interesting. 


I've also made a video version of this tutorial, split into two parts. You'll find a link to each at the bottom of the page.


Also, I've made the files available to download so that you can follow along.  Make sure you're using the latest Max and Vray:


TO DOWNLOAD SOURCE FILES:


Download Source File Here (3ds 2019 and Vray 5 req'd)


Here's a few rendered out pics.  Check out the resulting stains from the fingerprints, the lipstick stain, as well as the wine legs dripping down the interior of the wine glass on the right.


The Setup


This is the scene.  A very basic studio setup. Two wine glasses, on a surface, with some general lighting:


Fingerprint Stains


I began with a simple glass material.  Diffuse at black, full white reflection, nearly full white refraction, glossiness at 0.99 and IOR at 1.55.


Then I used a fingerprint mask (you can download it along with the rest of the source files above) on the reflection glossiness slot for the smudging.  I used a VrayTriplanarTex map to control the mapping, as well as an output to control the contrast of the map and thus the level of smudging:


Here's the result.  Obviously, I've exaggerated the efect to make it more visible, but notice how the fingerprints smudged nicely acrooss the glass:


Lipstick Stain


For the lipstick stain, I made a VrayBlendMtl combining both the basic glass material we created above along with a new red lipstick material (composed of an opacity mask in the shape of lips and a lipstick red solid "VrayColor" in the diffuse).  Make sure the mask is set to NOT be tiled.  We only want one set of lips.  Then, map the mask onto the rim of the glass, using your judgement on scale and location.


Here's the result.   The individual that drank from this glass was mighty sloppy ;-) 


The dried out wine stains on the inside of the glass


To create the dried out wine stains insdide of the glass, I first made sure that the inside surfaces of the glass was mapped to mat ID 2 and the exterior surfaces to mat ID 1.  I did this using select polygons by angle tool at 20 degrees. 


Now I created a mask (again you can download above) with a few drips and stain marks, and used the VrayMultiSubTex tool to map it to the interior side of the glass.  I then applied the mask to the Refraction slot, so that wherever there were stains, the glass would be less reflective.  I then used the same technique to make the stains wine red, using a solid VrayColor and a composite map masked by the very same stain mask.  Here's the material:

And here's the result.  Notice the subtle stains on the interior of the glass (the one on the left):

Whine Legs


Another cool effect we will be adding to the glasses is that of wine legs dripping down the interior of the glass.  This we accomplished with a simple bump map.  


Once again, I created a texture for the bump map, using a combination of raindrops and drip pictures I found online.  Once it looked right ot me, I blurred it just a bit and converted to black and white.


I duplicated our original base glass material, added the original fingerprints, and placed our newly created texture in the bump slot, using the same "VrayMultiSubTex" tool that we used for the dried out wine stains above.  This allowed me to place the bump map solely on the interior of the cup, where the wine legs would be.


I made the bump subtle, and blurred it a bit.  Here's the material.


Here's the result.  Check out those awesome wine legs on the cup on the right: 


Conclusion


Hopefully, you have found this guide to be enlightening as to some of the tools at our disposal when we want to create dirty glass.  We did exagerate the effects in order to emphasize the result; but, these tools, used subtly in our real renders should add more complexity and interest to our images, ultimately helping us achieve getting one step closer to photorealism.


Over the next few weeks, I will continue showing what methods we could use to continue adding dirt and other imperfections into our images.


Below, you will find a video version of this tutorial, split into two parts.